HOW TO INSTALL
1. Cut the brackets to length
Cut the Sawtooth Shelf Bracket to length and put one in each corner of the cabinet, bookcase or alcove, so the sawtooth pattern faces each other. Pin them into place. You can glue or screw the brackets in, but in all the years of making bookcases and cupboards, I have only ever needed to pin them.
2. Measure how much cleat you need
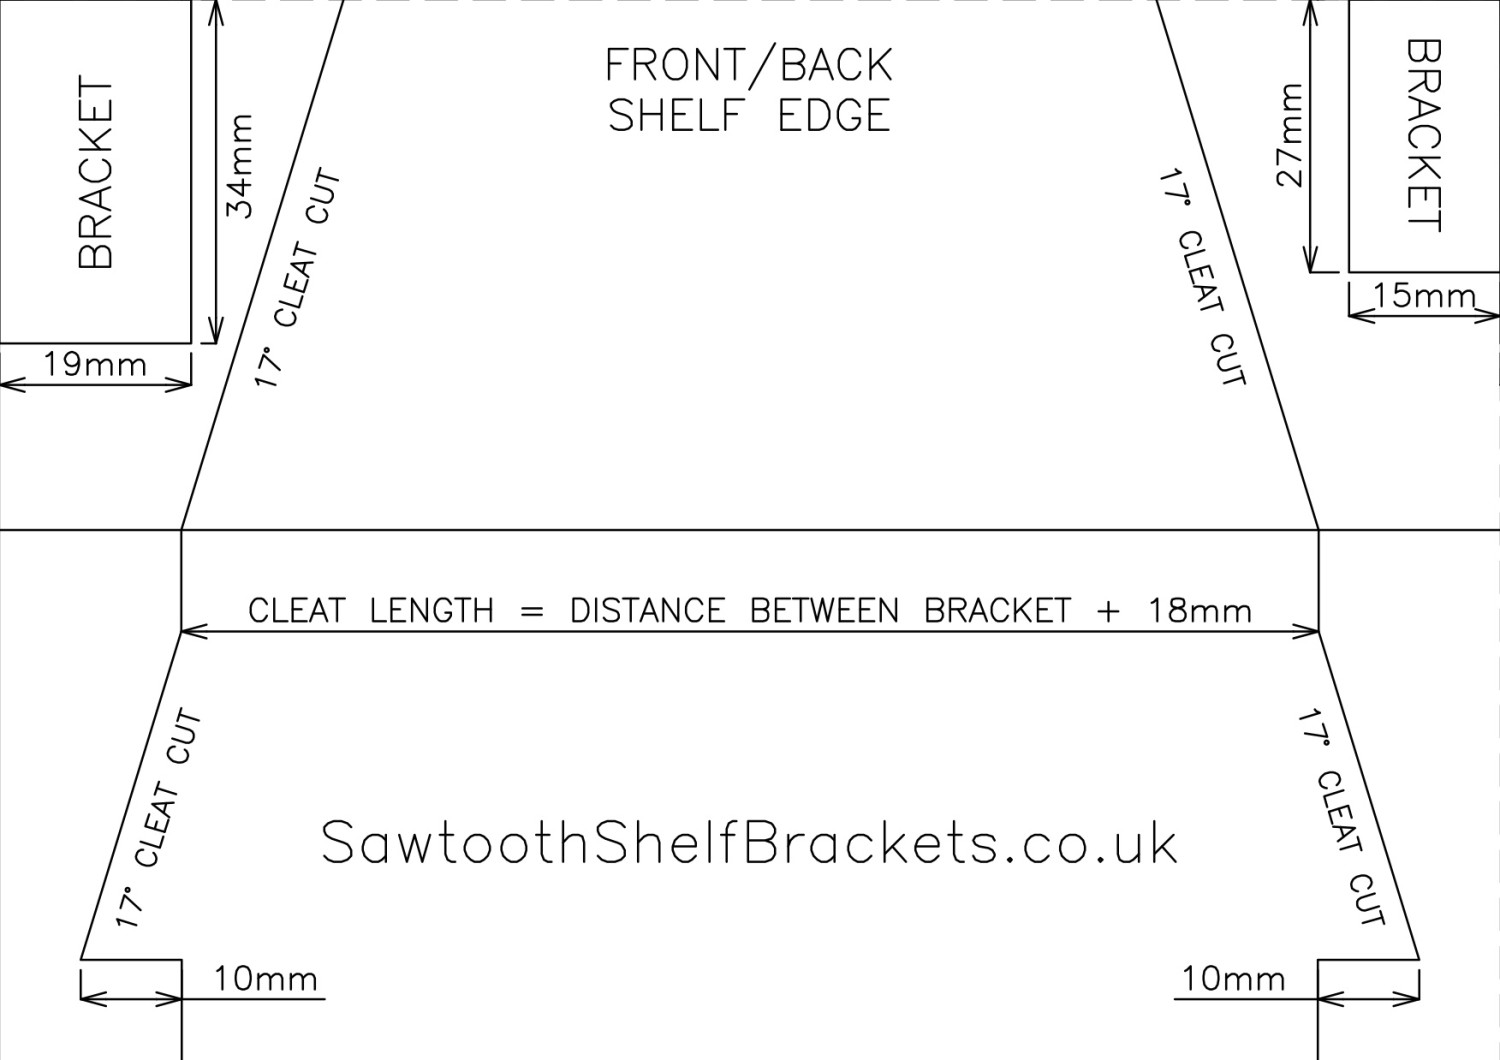
First, carefully measure how much cleat you will need for each shelf. The length of the cleat depends on the depth of the cabinet and fits between a pair of sawtooth brackets.
We advise you to order a bit more cleat than you think you might need, to avoid extra postage costs.
3. Cut the shelf to size
If you’re cutting the shelf yourself, it should be a little bit shorter than the internal opening space. You can use the template to cut out all four corners of the shelf to accommodate two different sizes of bracket.
For any shelves over 900mm, I would recommend putting in another pair of brackets in the back and in the cleat, as illustrated in the picture.
4. Add the shelves
Place the shelf inside the space with each end resting on the cleats. The shelf is fully adjustable and can be moved up or down by simply moving the cleat to a new position in the bracket.
5. Enjoy your new sawtooth shelving
And if you have any other questions, please get in touch.
